
")
You have a neat theme for WordPress, but the feel may not be just as you want it. Some fonts may feel not quite right. The hues may be just way off-brand. Or the layout may not have your signature branding on it. The kicker? You don’t want to touch a line of code. Sound like something you identify?
Good news! You don’t have to be a developer to maintain the appearance of any professional website. Rather, working on the WordPress platform, customizing a theme is super easy — doesn’t require a single line of code written in HTML, CSS, or PHP.
In this article, I am going to teach you how to customize your WordPress theme step by step, using built-in tools, theme settings, page builders, and plugins — all with absolutely no coding knowledge!
Let us get rolling!
📌 Table of Contents
- Reasons For Customizing Your Theme
- Instruments Needed to Go About It
- WordPress Customizer
- Block Editor Customization (Gutenberg)
- Customize with Page Builders (Elementor, etc.)
- Install Child Theme (No-Code Version)
- Adding Custom Fonts and Colors
- Change Header, Footer, and Menus
- Use Theme-Specific Options
- Bonus: Customize WooCommerce Pages
- Good Practices to Follow
- Final Thoughts
1. Why Customize Your Theme?
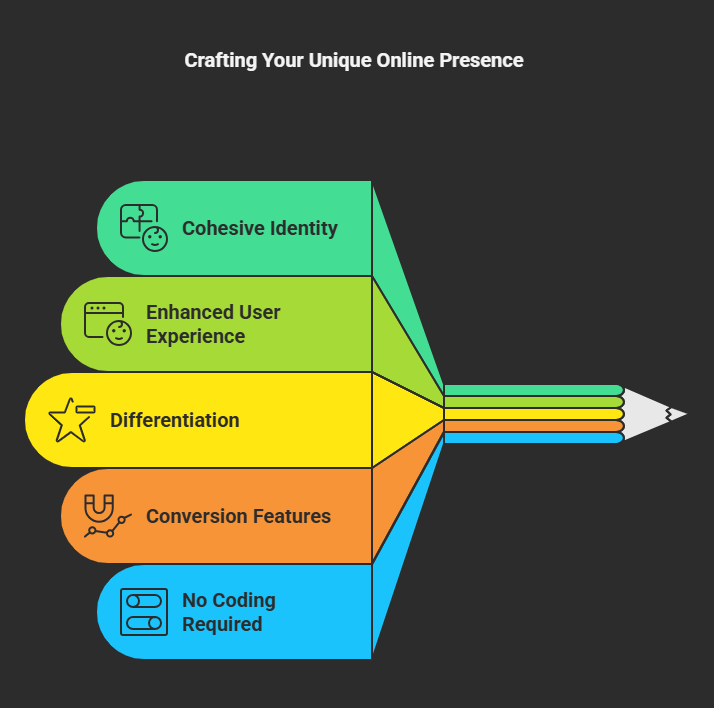
Your theme is the canvas; your brand is the paint. Customization can help you:
➣Bring a cohesive identity to your site.
➣Enhance user experience and usability.
➣Differentiate yourself from thousands of websites using similar themes.
➣Add features to create conversions.
➣Best of all, you don’t need to enter a code editor!
 2. Tools that you will need (No coding required)
 2. Tools that you will need (No coding required)
You will have to use this handy tool and plugin during your customization journey:
➣A WordPress theme that supports Customizer or page builders
➣A drag-and-drop page builder (e.g., Elementor, Beaver Builder)
➣Easily install custom fonts or Google fonts plugin.
➣Optional header footer builder for more control.
➣A backup plugin such as UpdraftPlus for a staging site: Believe me, this will save your behind!
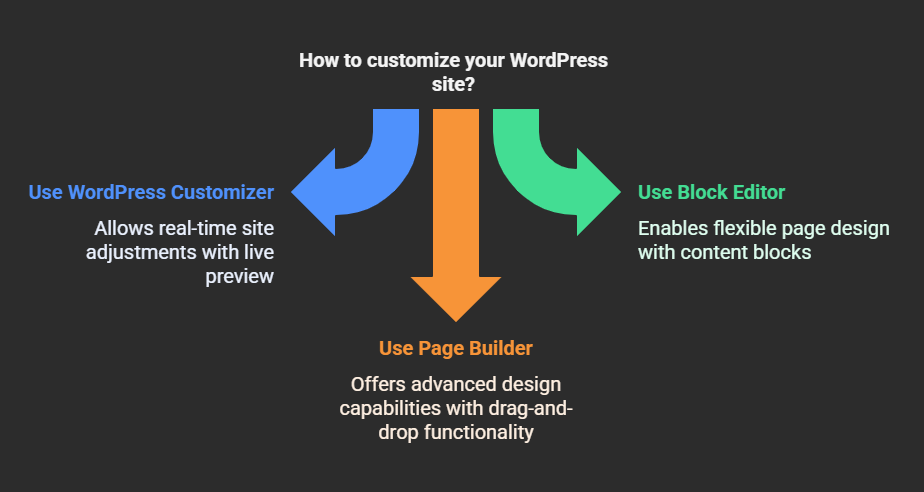
3. Use the WordPress Customizer (Your New Best Friend)
Most modern WordPress themes are Customizer-compatible, meaning you can tweak your site in real-time from the WordPress dashboard.
How to Access:
➣Go to Appearance ➝ Customize.
What you can do here is:
➣Change the Site Identity (logo, tagline, favicon)
➣Add Layouts (side bar position and container width)
➣Typography Settings (font size, line spacing)
➣Color Schemes (headers, buttons, links)
➣Add Widgets (footer and sidebar)
➣Set Homepage Settings (static versus blog)
Coding is not required, just point, click, and save.
💡 Pro Tip: Use the live preview to test changes before publishing.
4. Customize with the WordPress Block Editor (Gutenberg)
The built-in WordPress block editor allows you to create flexible pages through content blocks. It is not as sophisticated as some page builders but works well for very simple designs.
What Can You Do?
➣Adding columns, images, video, buttons, spacers
➣Using pre-designed block patterns
➣Customizing the margins, padding, backgrounds, and typography for each block
And it is mobile responsive right out of the box.
✨ Want extra design freedom? Install plugins like Kadence Blocks, Stackable, or GenerateBlocks.
 5.Drag-and-Drop FTW: Customize Using Page Builders
 5.Drag-and-Drop FTW: Customize Using Page Builders
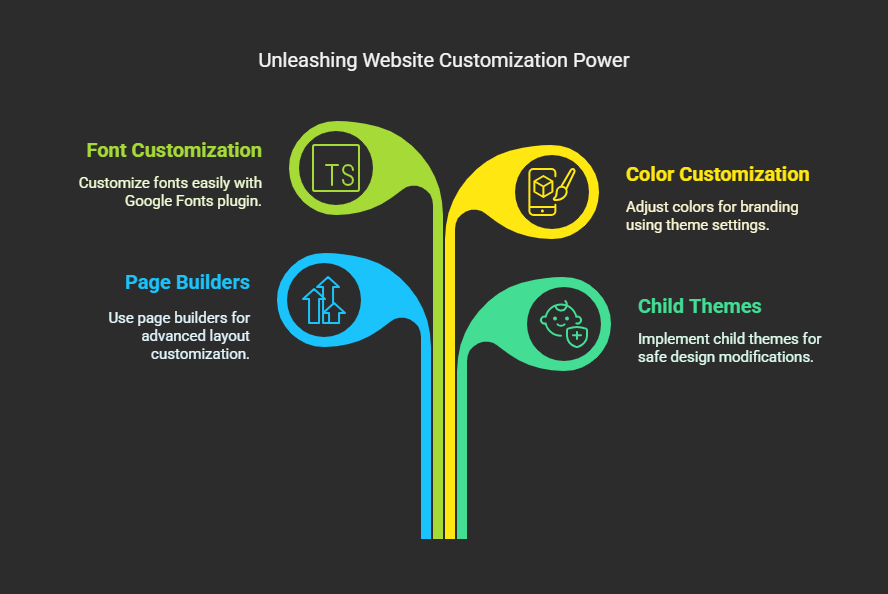
If the Block Editor seems able for anything you are trying to achieve, then it is time to pull out some bigger weapons such as the page builders:
➣Elementor (free and pro)
➣Beaver Builder
➣Divi
➣Brizy
The ability to:
➣Create layouts from scratch;
➣Cute drag-and-drop functionality with widgets;
➣Placing sliders, testimonials, galleries;
➣Reusable templates;
Example:
With Elementor, you can customize:
➣Header and footer (using the free Hello Theme);
➣Landing pages;
➣Contact forms;
➣CTA buttons with animations;
While doing all this, you can keep smiling, there is no code involved.
6.Install a Child Theme (Yes, Even If You Can’t Code)
A child theme allows really safe design alterations – changes wont get lost if the parent theme is updated.
But here’s the thing: you don’t need to create a child theme yourself. Use this:
Child Theme Configurator – creates a child theme with one click!
You can use it to:
➣Override template files (if necessary)
➣Add some styling via plugins like Simple CSS
It’s the pro move – even for non-coders.
7. Custom Fonts and Colors at Your Fingertips
When it comes to branding, typography and color are everything. So here is how you can make those adjustments gradually:
Fonts:
Install and activate the Easy Google Fonts plugin > Appearance > Customize > Typography.
You can select from 1,000+ fonts and modify sizes, weight, and line height – no code needed!
Colors:
Most themes allow you to change:
➣Background Color
➣Header/Footer Color
➣Button/Link Color.
🧠 Tip: Stick to 2-3 brand colors for a clean, professional look.
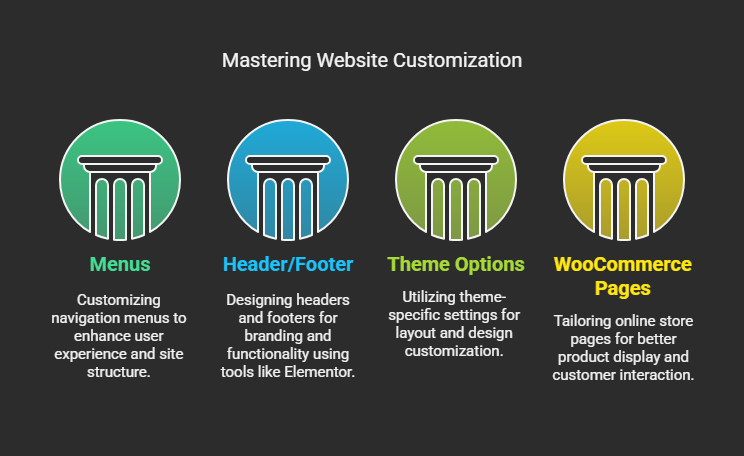
 8. Altering your Header, Footer, and Menus
 8. Altering your Header, Footer, and Menus
Header and footer sections are prime properties, and they should be put to good use!
Menus:
➣Navigate to Appearance → Menus.
➣Add custom links, pages, categories.
➣Create dropdowns.
➣Set to use as the primary, secondary, or footer menu.
Header/Footer:
Use Elementor Header & Footer Builder (a free plugin) for designing sticky headers, mega menus, or custom footers.
Or simply use theme options from Customizer → Header/Footer.
🍔 Want a mobile-friendly hamburger menu? Most page builders have built-in options.
9. Use Context-Sensitive Options
So if you are using Astra or OceanWP or Neve or Kadence, you have a huge advantage.
These themes have offered tremendous layout and design settings under the Customizer itself, for example,
➣Layouts of blog posts
➣WooCommerce product display
➣Sidebar visibility
➣Page-specific settings
Again, look for the options panel. It is customization, on steroids.
10. Bonus: Customize WooCommerce Pages
Get an online store? Customize your product pages, checkout, and cart — no PHP needed.
Use These Plugins:
➣Elementor + WooCommerce Builder – to take full control of your product layout.
➣ShopEngine (free) – great for templates.
➣WooLentor – powerful and flexible.
Tweak product grids, filters, tabs, reviews, et cetera — and make your store uniquely yours.
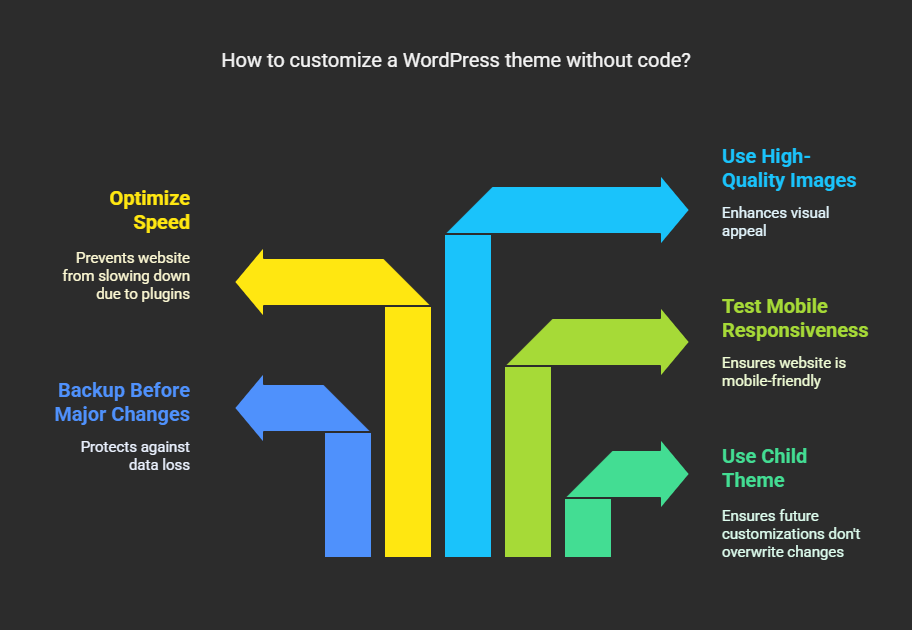
 11. The Best Practices for Customizing Themes Without Code
 11. The Best Practices for Customizing Themes Without Code
Customizations can become excessive; staying true to these best practices should help:
⭆Use a child theme, even if code is not being modified
⭆Countercheck with a backup for major changes; plugins such as UpdraftPlus prove useful
⭆Mobile preview must be done– go for testing responsiveness in the Customizer
⭆Speed optimization: not to put too many plugins
⭆Examples must be in high quality: use Canva for that
💡 Rule of thumb: If it feels overwhelming, simplify. Clean design > cluttered design.
12.Conclusion: Code-Free May Not Be The Medicine
Creating your WordPress theme customization without code is not just possible but actually a lot of fun; with the right tools and a little creativity, you can build a website that looks like a pro did it (even if it was all drag-and-drop magic ).
Here are the tips I recommend:
⭆Start with Customizer
⭆Shift to Gutenberg or a page builder
⭆Use plugins for specific tweaks (fonts, headers, etc)
⭆Always preview and test before publishing
You’ve got this! Whether you’re building a personal blog, a small business site, or an online store — you can make it 100% you, without ever touching code.
It’s your turn now: What is your personal favorite no-code magic trick?
Do you happen to be using Elementor? Crazy about new Astra features? Or maybe, even you are totally a Block Editor devotee?
Join in and write a comment below: I would love to find out how one makes WordPress magic without writing a single line of code!